A battery I've had kicking around for a while is depleted. While it charges, the old efficiency meter faceplate is scored to remove all decals.
Can't do anything about the holes in the faceplate, can only accept them. So the switches are plotted out while being mindful of re-using existing holes. New holes needed are marked in pencil.
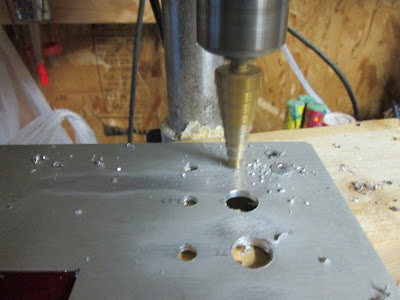
Holes are cut according to the diameter of the switches that will occupy them. The faceplate is soft aluminum and easily cut with a step bit.
LEDs and switches are clearly marked on the inside of the faceplate.
Black, beige, baby blue and yellow spray paint is available on the shelf. This is a no-brainer, I think. The faceplate is painted outdoors and left to cure.
If I was forced to watch Tremclad dry, I would starve to death. The painted faceplate takes three days, and even then is very easily marked. Maybe I'm just not patient enough.
Switches are dry-installed, along with LEDs. Some unused holes are filled with dummy screws, which at least look like they serve a purpose, unlike holes. The layout would be different if the faceplate was blank, the speaker terminal being in the very center seems dumb. At this point I second guess the whole 'continuity / single cue' circuit. This may end up changing.
At least the four cue-firing momentary switches on the lower left make sense, and the 5-position switch above it will be intuitive.
At this point, given the weird layout, unnecessary (and second-guessed) continuity/single cue circuit, and the need to charge the batteries that may be contained within the panel, I think of changing the purpose of this circuit's switch (to ON/CHARGE), and speaker terminal (to accept a charge from an external source). More on this later I'm sure.
A nice feature of the old furnace efficiency meter was the flip-up action of the faceplate. This will make it easier to work on and service in future.
Next steps are figuring out the battery orientation and wiring the whole thing up (mostly) per the plan. Attention will then be turned to the junction box and cue slats.


No comments:
Post a Comment